BMW bags? Not this time!

Inspired by CycleRob, this section is devoted to all flavors of the F800.

Moderator: Moderators

Post Reply
User avatar
CycleRob
Honorary Lifer
Posts: 2857
Joined: Mon Mar 21, 2005 12:29 am
Donating Member #: 1
Location: Enjoying retirement in Gainesville GA. USA
Contact:

BMW bags? Not this time!

Post by CycleRob »

When I test rode Atlanta BMW's F800ST it had the expandable, unfriendly to lane splitting, very wide BMW side bags. They looked small in their volume storage, were difficult to open/close and I just did not like the over-styled, banded look of them. They really interfered with getting on/off the bike! They were almost 2" wider overall than the BMW system city cases on my 1150R! The best deal on them would cost over $650!! :shock:

Now that I'm retired my luggage requirements are best described by the words infrequent and minimal. Then I did something a younger me would never have even considered. Shop for a tail trunk! Why? Because high up and way beyond the rear axle is the absolute worst place to put additional weight or a big draft catching box. It can dramatically alter/harm the stability of a bike.

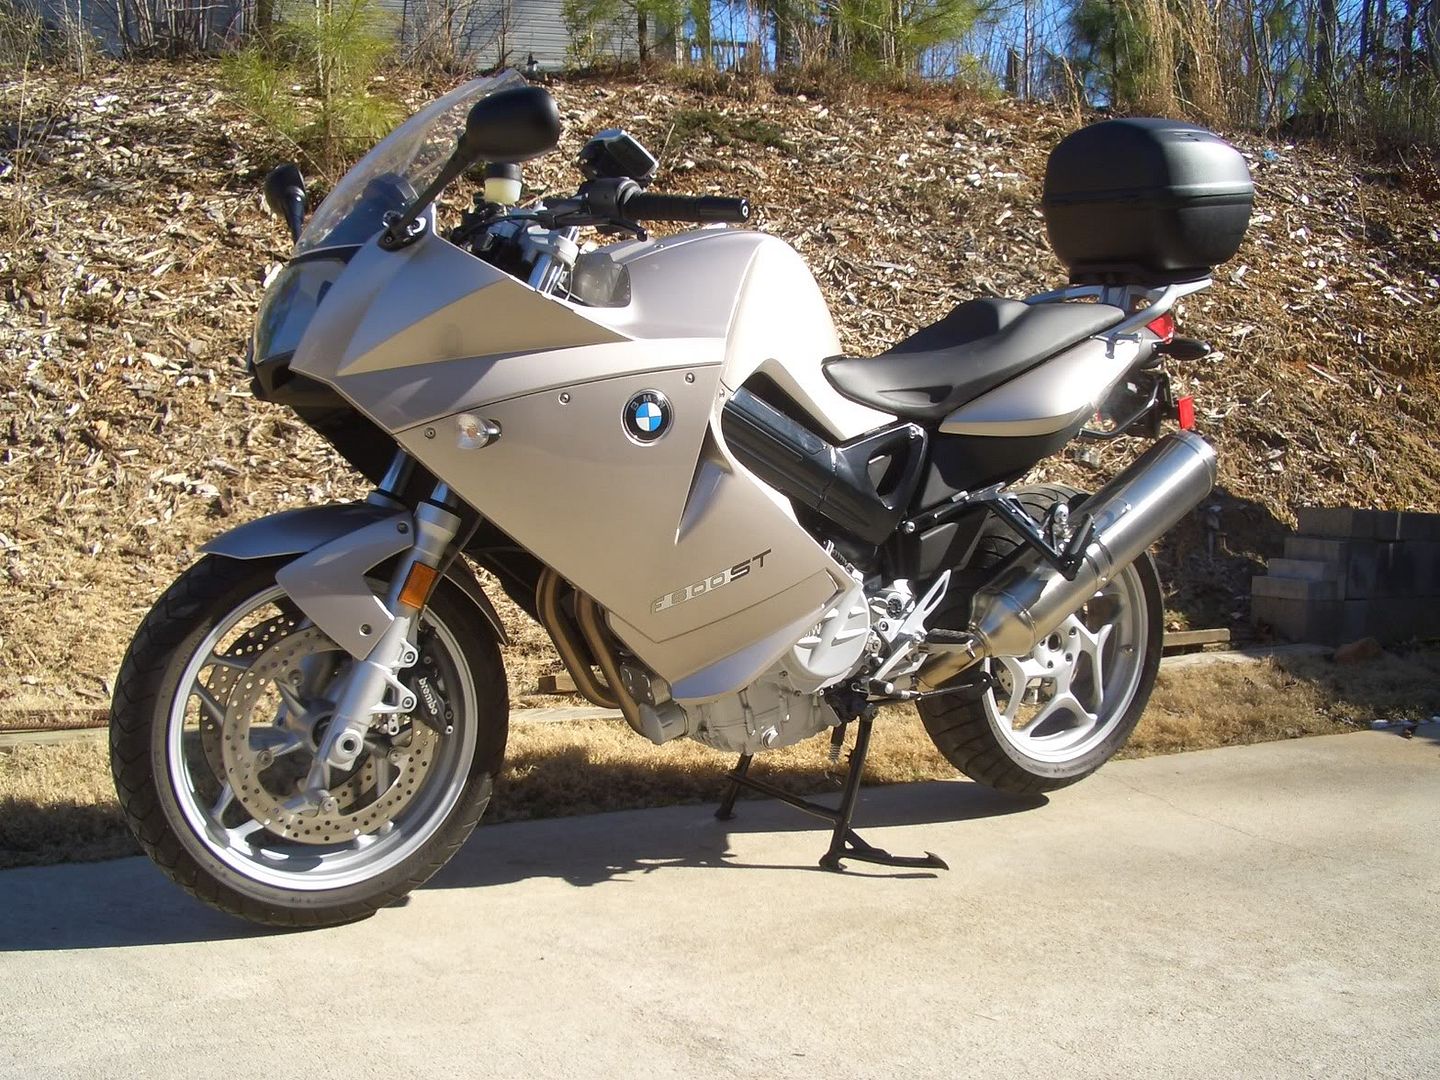
Tail trunk size was the most important. I wanted small. Found just what I needed in the Givi E260N. It was also $116 delivered to my door!! Here's what it looks like installed:
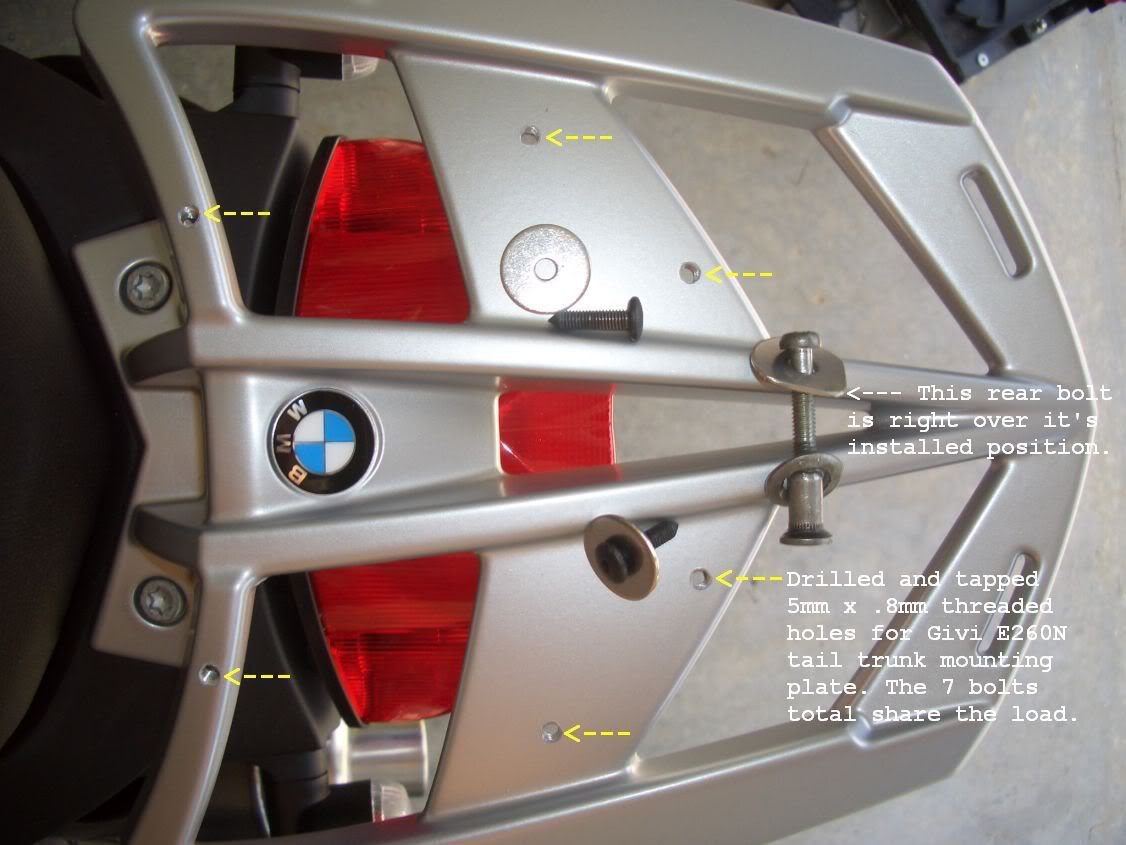
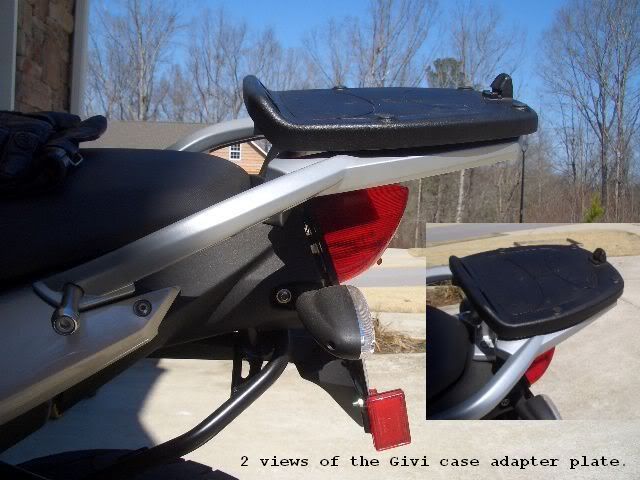
Adapter plate installation, my way
rear view
left front view
left rear view
Right center view

The case is sized and meant for scooters, but holds my full face Shoei helmet with almost an inch on top to spare. There is a 3 red LED brakelite kit and backrest pad available, but they are too expensive for what they are. Both can be created by the owner with careful planning and readily available parts/materials.The case removes with the key and a single button press. The case installs with the key and just tucking in the 2 front lugs then pressing the case into place with a loud CLICK. 10 seconds tops for remove or replace!

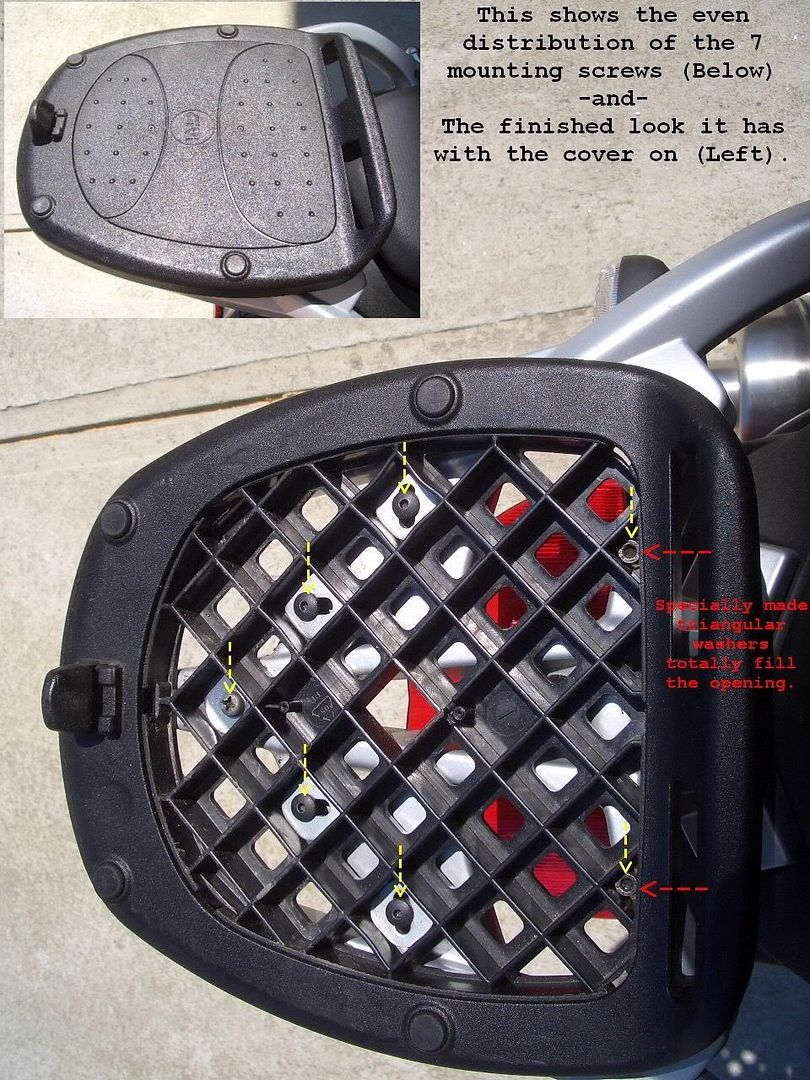
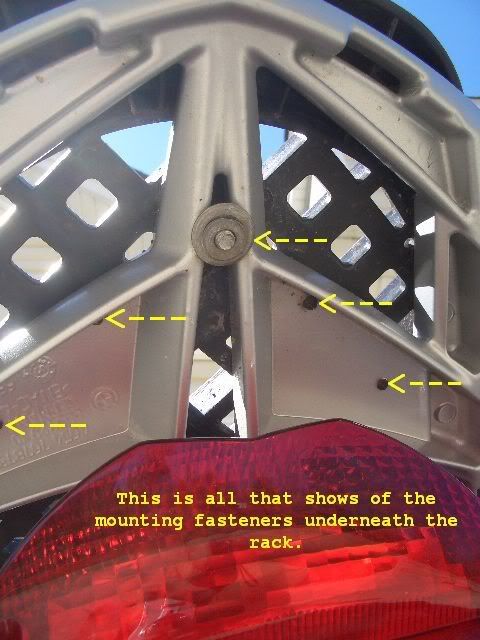
FYI: The supplied bolts and brackets did not guarantee the rack would be accurately located or securely restrained. Toss that! Looking it over, the many holes in the plastic adapter plate determined where the screws could go by the BMW rack showing thru 6 of them when the plate was located where it needed to be. Those 6 logically placed screws and 1 bolt securing the adapter plate to the BMW rack creates an incredibly rigid mounting that will never loosen, is practically invisible on inspection, has greater security against someone with simple tools and provides 7 as opposed to the default 4 attachment points. That shares the road shock load and high speed wind forces over 7 rather than 4 areas of the somewhat thin plastic framework, enhancing peace of mind it'll always be back there. Drilling and taping the six 5mm x .8mm threaded holes in the BMW rack's soft Aluminum requires patience and good vertical alignment. Surprisingly, riding the bike with or without the tail trunk attached feels the same. The lid outer sealing edge goes down over the inner bottom edge by about a half inch, without a gasket, so it very likely will not be 100% water tight in the breeze. The case does not show in the mirrors until I turn or tilt over sideways. It is almost always attached to the bike.

Money very well spent.

.
`09 F800ST

Member since Sept 10, 2001

"Talent, On Loan, From God" --Rush Limbaugh--
User avatar
Mollygrubber
Lifer
Posts: 815
Joined: Sun Apr 12, 2009 1:04 pm
Donating Member #: 741
Location: Vancouver BC

Re: BMW bags? Not this time!

Post by Mollygrubber »

Looks good, Rob. I have also never considered a top box, for the reasons you mentioned and also (and more importantly, to me at least) I never trusted that the factory mounting brackets could continuously absorb the forces generated by a long moment arm when encountering the inevitable big pothole, 4x4 or other hazardous road detritus. It always seemed to me that those cheesy connectors would eventually snap. Well, I guess given enough time they will, but you know what I mean.

Leave it to you to come up with a mechanically sound solution (given that the BMW rack is sturdy).

Food for thought. Thanks. Again...

Peter
Growing old is mandatory, growing up is optional.

2010 F800GS
Member #741
User avatar
CycleRob
Honorary Lifer
Posts: 2857
Joined: Mon Mar 21, 2005 12:29 am
Donating Member #: 1
Location: Enjoying retirement in Gainesville GA. USA
Contact:

Re: BMW bags? Not this time!

Post by CycleRob »

One thing well known in the design world is that any component is no stronger than it's weakest "link". Why use 4 quarter inch steel bolts and thick steel brackets (supplied with case) when the adapter plate's retaining surface is thin plastic? That's not right. Change the design. The best way to secure a thin plastic panel is with many small fine thread screws with large washers. That's what I did. Those 5mm x .8 screws are tiny, but they are still much stronger than both the BMW Aluminum rack they screw into or the case's plastic mount plate.

All of the 6 small screws had red LocTite applied to the threads. Here are other pictures of the mounting screws in their installed positions:
Top View
Underside View
Left Side View


.
`09 F800ST

Member since Sept 10, 2001

"Talent, On Loan, From God" --Rush Limbaugh--
User avatar
CycleRob
Honorary Lifer
Posts: 2857
Joined: Mon Mar 21, 2005 12:29 am
Donating Member #: 1
Location: Enjoying retirement in Gainesville GA. USA
Contact:

Re: BMW bags? Not this time!

Post by CycleRob »

Adding 3 super bright, white LED brake lights into the case lid is in my 2 spring mods plan. Mounting the Zumo450 to the false tank plastic panel is also in that spring plan. My yet to be finalized, create-it-from-scratch, case brake light LED installation will not be an `easy' shadetree mechanic job. The parts required can be seen in this pic of the $46 (+S&H) kit #-o :shock: [-X below:

Image

Doesn't look like much, does it? :roll: Note the male and female terminals that mount to the case floor and to the exact mating location on the adapter plate. They electrically connect the case's brake light LEDs to the bike power as you snap the case into place. For about $12 worth of LEDs, a resistor and 2 mating terminals from "the Shack" I can make an equally functional, trouble free, super bright LED system. With 2 blocking diodes and an additional higher Ohm resistor there can also be a half brightness running light using those same 3 LEDs. The very low additional power draw of those 3 LEDs does not trigger any reaction from the BMS-K main computer.

Just like the 2 evening, make-it-from-parts, key on power system that is working great, this add on bright white LED case lid brake light will be home made. I can NOT justify blowing $46 on that kit for the supplemental brake light by virtue of value principals ingrained in me. Those same principals you will interpret as being a cheapskate also allow a BIG dollar purchase, as detailed in my $700 Yamaha post in the Off Topic section. If the LED kit were $22 . . . . maybe. I feel challenged and even though it's unchartered territory, I'm 99% confident of 100% success. \:D/

.
`09 F800ST

Member since Sept 10, 2001

"Talent, On Loan, From God" --Rush Limbaugh--
Post Reply