I am very newly registered to this forum, although I have followed many search results into its depths. I have had my 2004 Rock since March and enjoy a love-like relationship with it. Only a "like" sometimes because I'm always wanting something to be a little better. The seat, I wanted a lot better. My previous, and first, bike was a Honda 599 that I liked and got me hooked onto two weeks but was getting a little long in the tooth when a drunk driver did me the service of writing it off (I was not on it at the time). One of my expectations and hopes of the BMW was that maybe they knew how to make a seat that didn't get me squirreling around after 30 minutes in the saddle. I expected too much. After spending a great deal too much time researching options, and being too cheap to invest in one of the big brand custom seats, and after being inspired by several other like-minded DIYers (probably a few on this site) - I finally decided to get my feet wet, butt cushioned and (by sharing) make a contribution too.
Ultimately I followed the great write up at http://diymotorcycleseat.com/ to decide on materials and as a general guide line of how to proceed. The re-covering process I copied from any number of youtube efforts.
Step 1) What do you want?
Decide whats wrong with your current seat. Or what you think is wrong. For me the seat was the low seat version (which I understand is not standard in the states?) so the slant was sliding me into the tank and driving me nuts (pun anyone?). In addition I have enough inseam to add a little height to the seat and uncramp my legs. I know that there are tall seat options that might have solved both these problems. But they are money, I wasn't 100% sure they would be what I wanted, they would still be just as hard on my butt and, for the desperate two days of looking online, there weren't any in good condition second hand.
Step 2) Get a seat.
If you know what you are doing, are not worried about resale value, or just outright bolder than I, you can start making alterations to your stock seat. Or, find a used, loved (read damaged) version of it on Ebay. I found a matching seat with torn vinyl for about $70. Patience might have got me a better deal but I had a bee in my bonnet. Actually a tall seat for the same money showed up days later but I was already committed.
Step 3) Buy foam and upholstery glue.
This part was hard since I had no physical feeling for what I wanted. Even following the advice in the link above it is hard to discern between the grades of foam. Also the shipping, and minimum order sizes make things get expensive quickly. I ended up using http://foamforyou.com/ to get everything I needed, and then a bit more. I bought the following:
1x Rebounded Foam 24 x 36 x 1 $6.85 (Used for about 70% of what I did - about 40% left over)
1x Poly Foam 82 x 24 x 1/2 $5.85 (Not used at all)
1x Luxury Firm foam 82 x 24 x 1 $13.85 (This I used as the soft foam to cushion things up - about 70% left over)
1x Tough Luxury Firm foam 24 x 76 x 1/4 $8.85 (This I used to wrap everything together and try make it look nice - about 60% left over)
1x Glue $6.85 (You need glue)
Shipping $25.00
The shipping did a lot of the damage there. I tried my luck at a local upholstery store trying to plead poverty but they tried to make too much money off me and lost my interest. And the rebond you can get from a home improvement store (though I only found 1/2" thickness) but they refused to cut me the short length I asked for. Maybe I'm not friendly enough.
Other tools called for include an electric carving knife and some form of grinder. I had neither and made do with a very sharp serrated kitchen knife. This made my work harder, and longer, and a little uglier but it worked in a pinch.
Step 4) Take the old cover off
(I forgot to take a picture at this stage but you all know what a seat looks like). This is not as tricky as some had warned. I used a screw driver to lever the staples and since I was planning on recovering the seat myself I did not have to worry about doing damage to the vinyl. There were a few near misses putting the screw driver through my palm. The vinyl was lightly glued to the foam but not enough to alarm anyone wanting to recover the seat, and nothing to worry me since I was about to do considerably more damage.
Step 5) Mark it up.
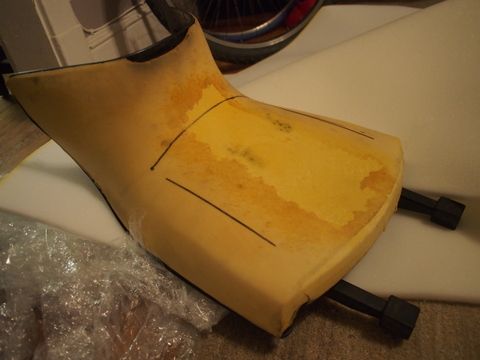
At this point I realized that I had no idea what I was doing and was flying by the seat of my pants. But I made the conscious decision to consider the money as sunk and get creative. I started with two ruled lines but after realizing how hard cutting a straight line in the rebond was with a knife, decided to go on blind.
Step 6) Start cutting.
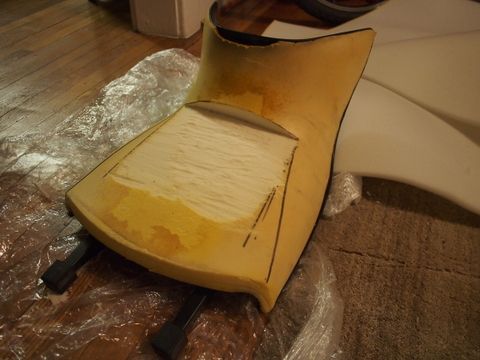
I wish I could give some real advice on how to achieve what you want, but I would be making it up. I had a vague notion that I wanted to raise the seat height, and reduce the forward slope. The first cut was to get a level playing field and get down to a wider part of the seat. Then I started laying the rebond down and looking at the angles:
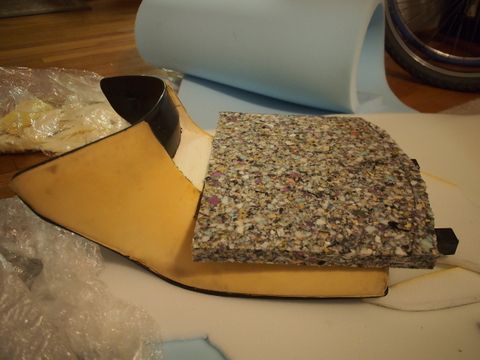
..and adjusting:
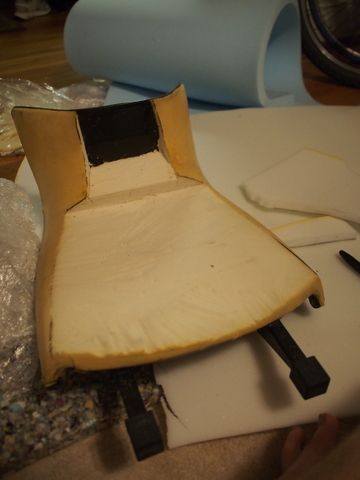
It is hard to see here but there is a step in the old seat foam of about 1" to line up with the soon-to-be added layer of rebond. I think I did this to try and get some continuity in the layers latter on...memory is hazy now.
Step 7) Commit and glue.
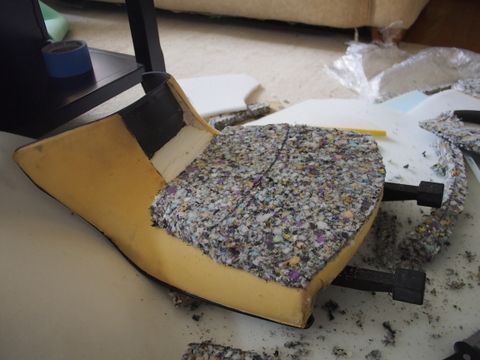
After cutting the rebond to something very roughly the right size, find an area away from children, pets, or favorite plants and try not get too much spray glue on the ground and walls. Spray both the seat and the new foam, wait for them to get tacky (get fingers sticky in the process of checking) and then squish them together. I am sure there is a science to this but I didn't know it. My result looked like the image above.I probably could have waited longer at this point for the glue to set but I moved right along. After trimming the corners and trying to get a smooth transition between the two foams I got something like this:
and....
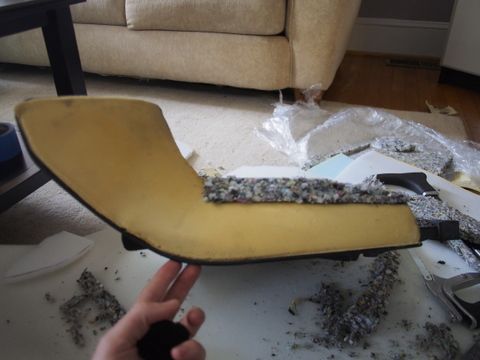
Step 8 ) Ask yourself what you have accomplished so far?
Which is what I did when I realized how close the side view looks to what I started from. That said it was now wider -giving me more latitude to go up- and I had cut my teeth on foam work.
Step 9) Start molding. Fitting. Sitting. Molding. Fitting. Testing. Mou...
From here on I did more walking back and forth to my bike, on the road at night, than anything else. Basically just sitting on what you have and jamming some foam where you think you need it. I feared that this process would be really hit and miss but it really wasn't. Maybe I got lucky, maybe my intuition was better than I give it credit, but I didn't end up scrapping any cuts.
Not a great angle but first up was a little wedge up against the tank end to start building up the nut crunching dip in the seat. The commit. Spray. Press. Wait 5 minutes.
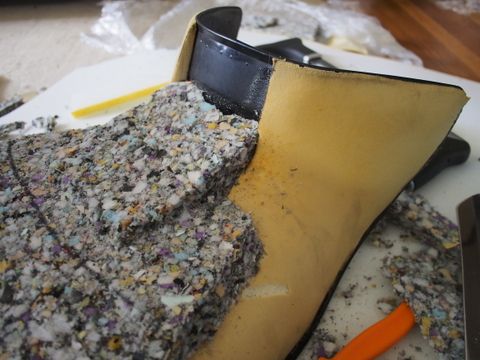
Then I realized that the wedge I cut was too narrow and did not give me any room to taper down to the the seat. So I cut these jigsaw pieces:
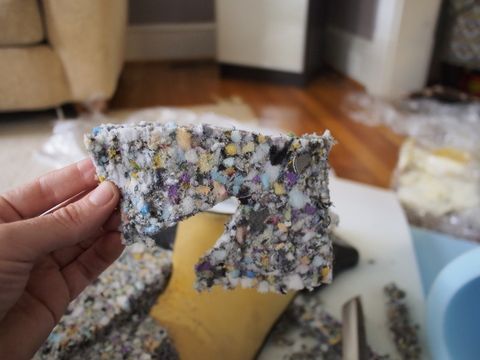
and stuck them on either edge of the center wedge like so:
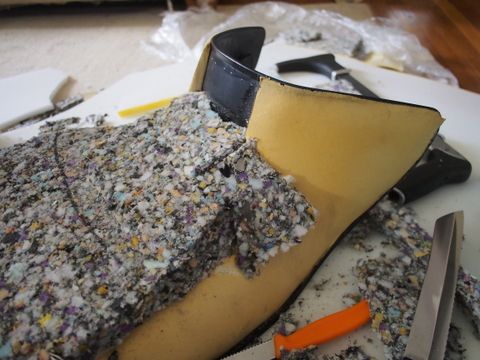
Actually quite proud of myself for getting that to work out so "neatly".
Another wedge:
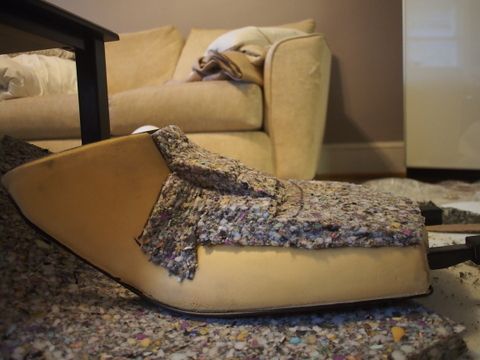
And it is starting to look better.....at some point I shaved the back corner off the bottom rebond layer to flatten it out. In hind sight I might have not done this.
Finally I'm happy with the level and height with a final top layer of foam to hide all the poor cutting beneath. Getting close to a final shape, I started to worry about symmetry a little more so I make a cardboard stencil of the final top shape and mirrored it to keep things close to even. By this stage I have probably walked the 15 yards out to my bike and back 50 times and am only just starting to feel like I'm sitting on a seat and not a block of foam. Still early days. Note that this top layer was not glued down yet. There was work to be done.
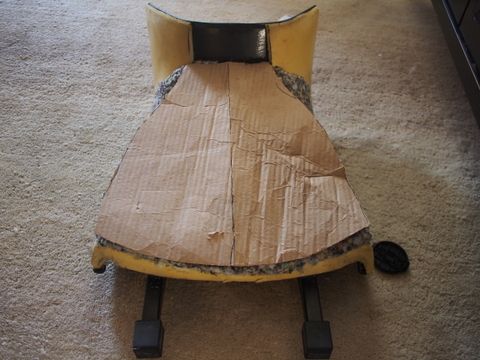
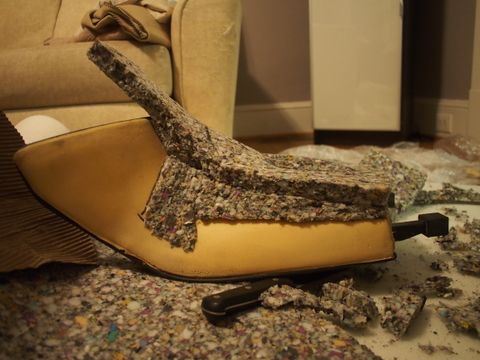
Step 10) Making space for your bum bones
The rebond foam has many virtues but being soft ain't one of them so I needed to cut out some spots for my butt bones. Pressure here was my main gripe with the old seat (I am not very well padded in that area).Trying to map out where these spots are, single handed, was probably comic to watch as I tried to sit on my bike, balance in a riding position and mark the seat all at once. This marks the first time I ever dropped my bike. My barrage of swearing seemed to have saved her from any apparent scuffs. Deed done, time for more cutting and shaping and arriving at something like this:
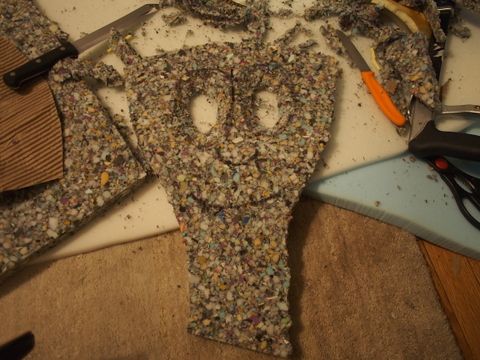
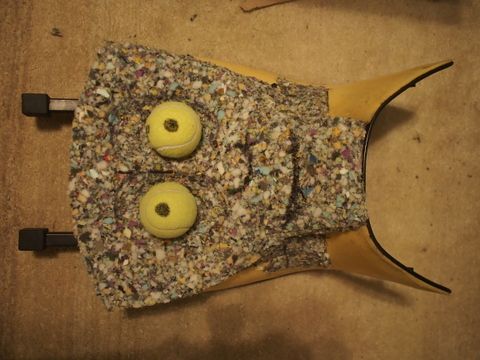
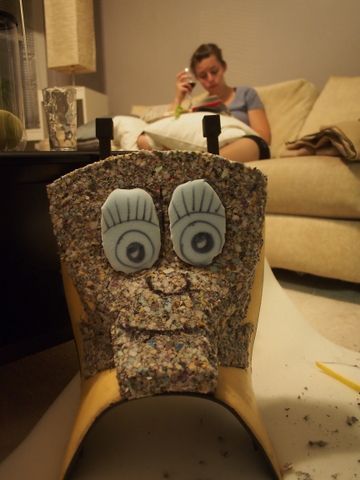
Again in hind sight, this is an insanely specific position for where my butt is going to be. Those holes should have been longer slots to give me some latitude to move around. Also from here on out I had two purposes. To make a comfortable seat, and to make a face out of my seat.
I briefly played with some ideas I read about putting air bladders under your seat to make some sort of airhawk like system but nothing robust enough could be done with what I had on hand. Again, I'm impatient when doing these projects. Instead the eye sockets above were to be filled with the luxury firm foam something like this:
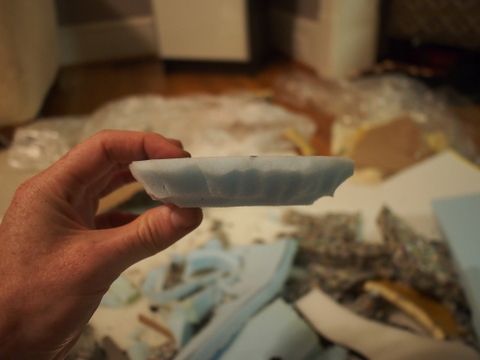

My lovely girlfriend ignoring us (me and blue eyes) with a book and wine.
Step 11) Padding the thighs.
Sitting on the bike again there was now a huge gap where my thighs should be. Also the top layer was too square and dug into my legs. So some shaping ensued. To fill the gaps I cut over-sized pieces of the lux-foam to pasted them onto the seat and then began the pain staking work of trimming it down to follow the seat contours and be comfortable. Although easier to cut than the rebond, its softness made making a smooth cut impossible. I would have liked the electric knife most here. Missed the before shot, but the after looked like:
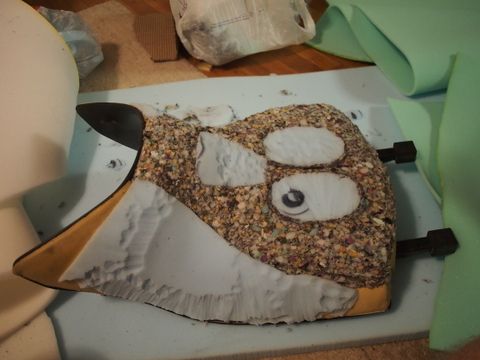
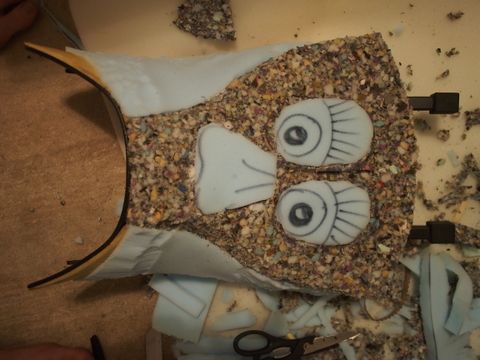
You'll notice that my monster has gained a nose. More sitting testing revealed its necessity. I hope you can guess why.
Step 12) Pat yourself on your back.
At this point the seat felt great. Those finishing touches above really pulled everything together. But there was more to do.
Step 13) Final cosmetic covering.
Despite feeling great to sit on, she is not pretty to look at (other than to her father that is). This situation might have been improved with more care, a ruler and better tools. In any case I think you want something to pull it all together. For that I used the thinner "Tough" Lux foam and stretched it over everything. This needed extra hands and one failed attempt but resulted in what looks like an alien being in a under armor body suit. But she was done for the night since I had nothing to cover her with.
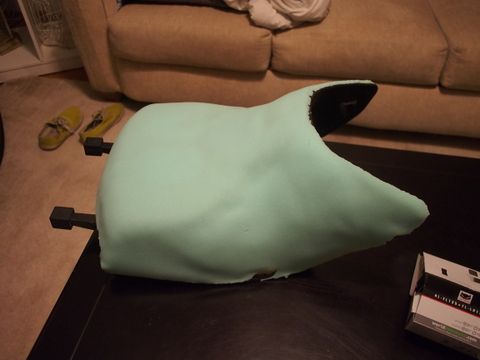
Step 14) Cover her up.
I was in two minds about how to cover the seat. There seemed to be seat covers on ebay that fit the Rockster seat, and they could even match the bike colors. But I had (and still have) no idea how much I could conform them to my custom seat. I suspect now that I might have got away with it but it was another chunk of change to waste if I was wrong. Instead I found a fabric store and bought 2ft of black vinyl for about $10. If it was in stock I would have upgraded to the thicker marine grade vinyl. Also 2ft was perilously close to not being enough.
The process involved a heat gun, and regular staple gun and another pair of hands. Again youtube has videos on people doing this part. Just be really aggressive with the tension in the vinyl and then put through several staples to distribute the tension across them. I suspect that just a single staple would tend to tear the vinyl. This is where the thicker vinyl would have been nice. Also a pneumatic staple gun would have been much easier as about 1/3 of the stables fired just crumpled on the hard seat plastic, another 1/3 went in half way and then stopped, and the rest seemed to go in like it wasn't a problem. There definitely seemed to be density variations in the plastic that made this harder. Also a real upholstery head (which is long and thin) would have made stapling the nooks a world simpler. As it was I did alright most of the way around the seat, but along the back edge I just would not get access to enough plastic to put in as many staples as I would have liked. I got enough in I guess..so far.
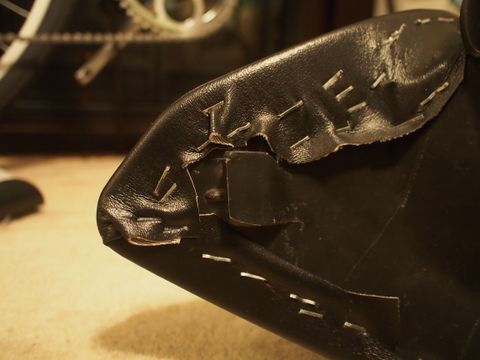
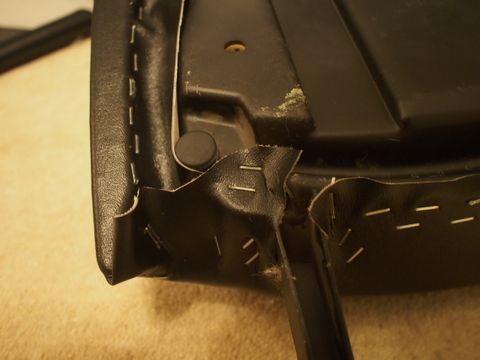
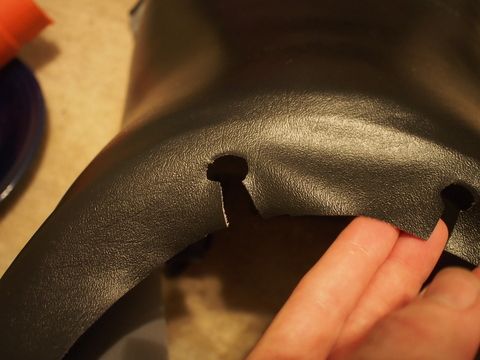
Along the front (around the tank) I cut in these little slits along with what I think will act as stress relievers. This helped me get a pretty clean line around the lip:
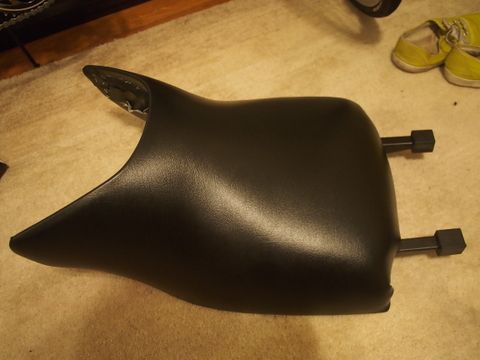
And finally, the finished product. It is dark out now but I will try get a picture of it on the bike to show how she looks. Obviously it doesn't match the back seat, and the aesthetic is worse for it, but not terrible by any means. Most people probably wouldn't think to notice it, god knows the bike has enough going on elsewhere to distract.
Final ride report and lessons.
Sitting on the new seat the first time and I was a little disappointed that it was firmer than I wanted. I think the tight vinyl played a part here. But then I tried the original seat on again and it felt like a plank in comparison. Suddenly the new seat felt just right. Looking at the new seat angle I realized that I was a little too aggressive in removing the forward tilt and sitting up right I feel like my hips want to tilt a little further backwards than is comfortable. Probably an easy fix if I ever get the motivation to take the vinyl off again. That said, my normal riding position is not up-right and when leaning forwards my butt finds that sweet spot I created and all is right in the world. I have not since ridden anything longer than an hour, but that hour was worlds apart from 30 minutes on the old seat. I'm a little concerned that only having one position that is comfortable and, as alluded to earlier, would like to lengthen the bum bone pits if I go back in. But for now I am a happy rider.
Total costs crept up more than I wanted. I could have found a cheaper scrap seat, and I now have enough foam to do a whole seat again. Finding someone to split the foam with would have saved $$. I would have liked proper tools too but that would have driven costs further towards commercial seat territory.
Total time invested was one very long evening, and then another two hours for the vinyl. Not bad at all.
I am sure many would be happy to pay a little more for a better looking seat, that is probably more robust in the long term. But this is very doable, cheaper and ultimately a fun little project to call your own. I hope a future me finds some use from this long long long, virgin post.
Cheers
Graham
